NZXT Kraken G10 Review: Liquid Cooling for Your GPU
by E. Fylladitakis on March 11, 2014 1:15 AM EST- Posted in
- Cases/Cooling/PSUs
- NZXT
- Water Cooling
- Kraken
- G10
The Kraken G10

Essentially, the Kraken G10 is just a steel bracket that locks onto an Asetek-based round waterblock and allows its installation on graphics cards. NZXT offers the Kraken G10 in three glossy colors: black, white and red. We received the black version of the bracket.

The paintjob is very good at the top of the bracket, with a very clean glossy finish, yet it's not very good on the bottom side of the bracket, as it is uneven and even sagging near the edges. It is the top side that will be visible once the cooler is installed on a card, yet a more careful paint job would not hurt. The company logo is etched on the side of the Kraken G10, in direct line of sight from a side panel window. Two large cable tie mounting points can also be seen, which can be used to hold the hoses and/or the cables of the liquid-cooler.
Installation
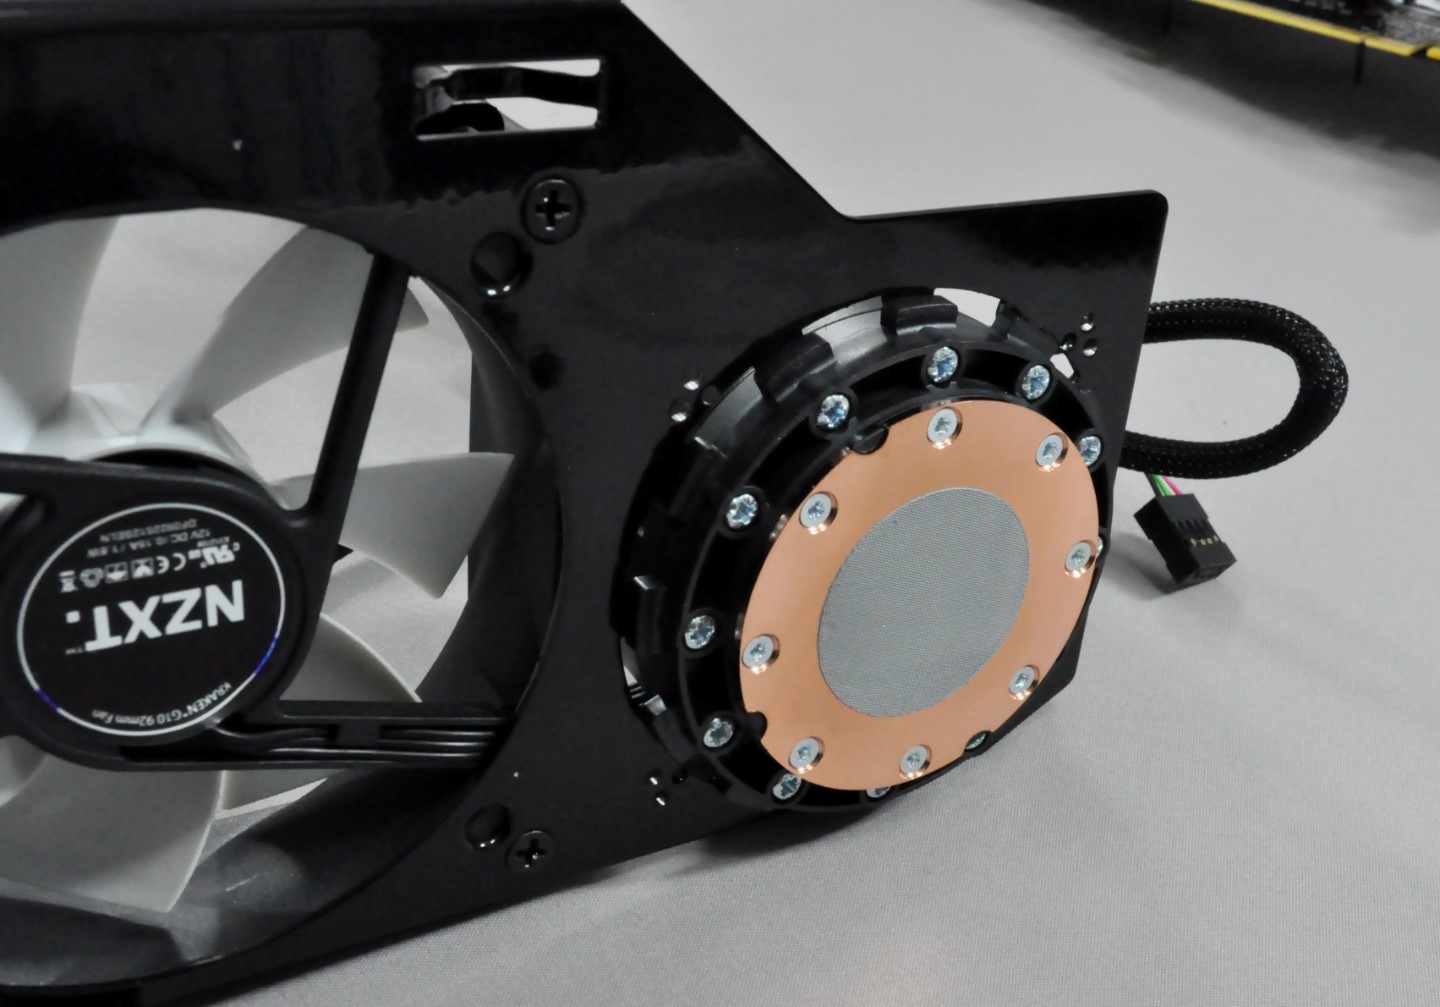
The installation of the Kraken G10 is fairly easy. Once the stock cooler of the graphics card has been removed, the 92mm fan should be installed on the bracket with its engine facing upwards. Then the bracket can be easily installed on the liquid-cooling block by using the same plastic locking ring included with the kit's CPU installation hardware. Ideally, the hoses should be facing towards the front side of the bracket, as the cable ties can be used to hide them behind the bracket.
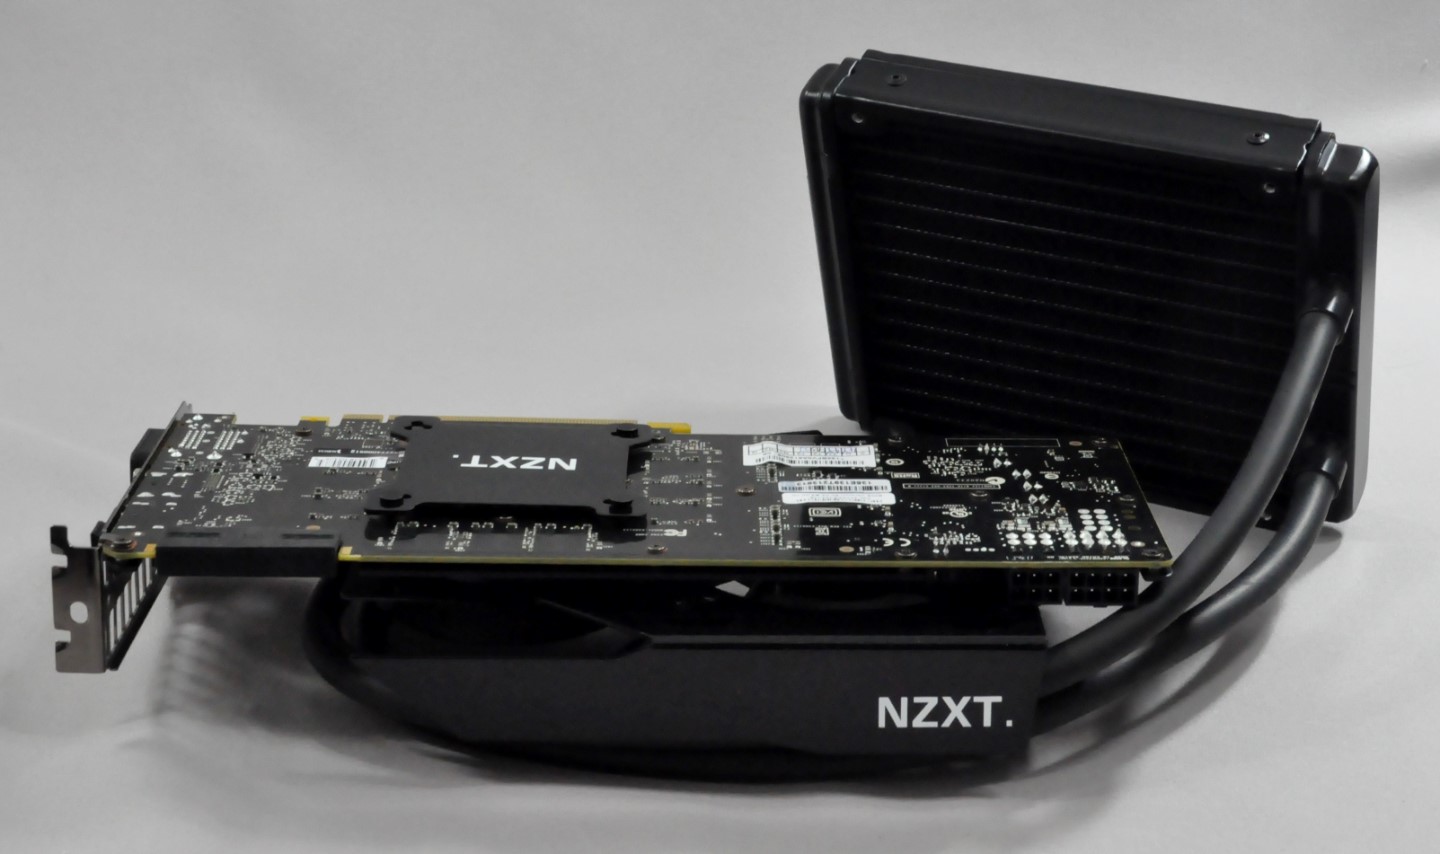
Once the block+bracket assembly is complete, it is a simple matter of using the backplate and installation screws included with the G10 in order to attach it to a graphics card. The installation of the Kraken X40 kit with the aid of the Kraken G10 on an EVGA GTX770 is depicted in the gallery below.
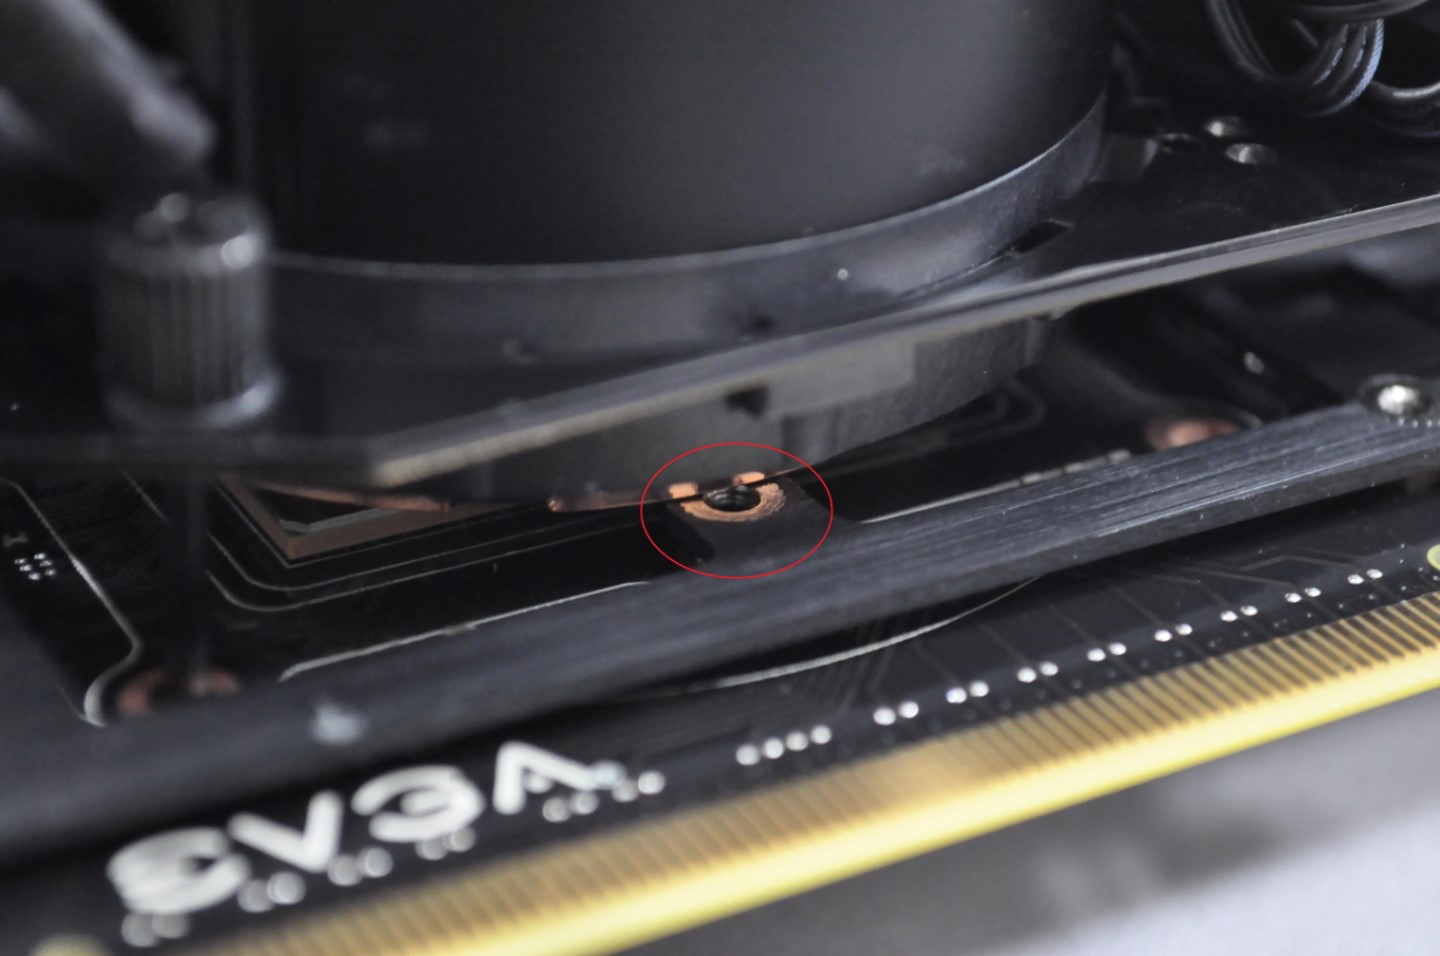
Note that it may be necessary to remove more than just the main cooler of the graphics card; as shown below, the RAM/VRM heatsink of the graphics card prevented the block from seating on the GPU and had to be removed as well. This will vary according to your choice of GPU/card.


61 Comments
View All Comments
lavaheadache - Tuesday, March 11, 2014 - link
I thought NZXT bought the design(idea) from d-wood? Funny how they get all the creditsicyo - Tuesday, March 11, 2014 - link
I immediately thought of d-wood's bracket too, as I have been using one for about a year now.I wouldn't look down on NZXT, they're making it more publicly available. d-wood couldn't keep up with demand and as far as I've seen, has been MIA. His last post on overclock was 9 months ago.
sicyo - Tuesday, March 11, 2014 - link
Hah, wish I could edit that. NZXT is already out of stock. Hopefully they'll be able to keep up. There are a lot of gamers out there that want to liquid cool their GPU without spending a lot on a custom loop.SodaAnt - Tuesday, March 11, 2014 - link
I've had d-wood's bracket for almost two years now, and it works pretty well, but its nowhere near as pretty as this.malnute - Thursday, March 13, 2014 - link
Not sure what is so hard to understand I bought you and your designs hence you are now invisible.jtrdfw - Monday, June 2, 2014 - link
Well, the thing about buying the rights to a product is...taserbro - Tuesday, March 11, 2014 - link
Is there enough headroom under the 92mm fan to install some copper heatsinks for the VRMs and memory modules? I've seen a few reviews of this kit but none of them seem to address this.Some cards like the EVGA 780ti have been leaving the VRMs naked under the cooler and there have been documented cases where prolonged full load use resulted in hardware failure due to the lack of VRM cooling. While the prospect of having so much overclocking headroom on the GPU temperature front is quite attractive, I wouldn't want to instead fry the card's power delivery circuitry.
Yungbenny911 - Tuesday, March 11, 2014 - link
Yes, there is more than enough room under the fan to install copper, or aluminum heatsinks for the VRMs and memory modules.Recent GPU's like the MSI Gaming 770 and 280x already have a passive heatsink cooler on the VRM's and memory modules. I left that on, and placed aluminum heatsinks on the passive heatsink. I also have dual side-panel fans blowing directly on them to prevent overheating. Works just fine for me, and i'm able to OC my memory to 2004Mhz on my gaming 770 without heat problems. http://i.imgur.com/viYQ6eL.jpg
kyuu - Tuesday, March 11, 2014 - link
Could you please tell what the clearance is and, therefore, what kind of heatsinks could be installed for the VRM and memory? I'm quite interested in this, but I'm not too enthusiastic about leaving the VRM and memory naked and depending on just the fan to cool them.Yungbenny911 - Tuesday, March 11, 2014 - link
This is what my Gaming 770 looked like when i took of the Twin Frozr IV cooler.http://www.techpowerup.com/reviews/MSI/GTX_770_TF_...
The black plate you see is the passive heatsink cooler i was talking about that already covers the V-ram modules and VC. I didn't take that off while installing my bracket and H55's, i just attached this type of Aluminum heatsinks to it (8 for each 770) http://www.newegg.com/Product/Product.aspx?Item=9S...
There is still enough space between the bracket and aluminum heatsinks to allow air pass through.