AnandTech Guide to Better Photos: Portraits
by Stephen Caston on January 19, 2005 12:05 AM EST- Posted in
- Digital Camera
Outdoor Portraits
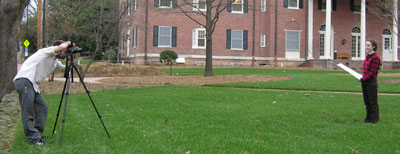
In the daylight outside, there is usually more than enough light for versatile portrait photography. One of the greatest opportunities for portraits is an overcast day. The diffusion of daylight through the clouds creates a very pleasant soft light that looks great for portraits. If there are no clouds to shoot under, look for the shade of a tree instead. The effect is similar with the sunlight filtering through the leaves. Without shade from the sun, there will likely be strong shadows and bright highlights on your subject that will be difficult to expose properly. Strong shadows tend to exaggerate noses, wrinkles, etc. - all of which your subject will not appreciate.When arranging your shot, pay close attention to the direction of light. Have your subject face in different directions while you monitor the effect. Even with diffused overcast lighting, if the light is shining down from a position above your subject, there will be some soft shadows that may not be the most flattering for your subject. To remedy this, there are two popular options: reflectors and fill flash. A reflector is simply a white or colored surface that is used to bounce light upward into the subject's face to fill in shadows. The difference in the color of the reflector simply affects the color cast on the subject. For example, if you wanted to reflect a warmer light, you could use an orange reflector. Below is an example of how a reflector can be used.

Subject at right holding reflector
In the image above, our subject held the reflector herself. If we were taking full body portraits, we would obviously need another method of holding the reflector. In the absence of assistance, a tripod and self-timer will allow you to hold the reflector for your subject. In the example below, we used a large white piece of cardboard to reflect light into shadow areas on the subject's face. You can pick up one of these inexpensive reflectors at any office supply store. However, high quality collapsible reflectors can be purchased from professional camera stores as well. Hold your mouse over the image below to see the difference.
In the above image with the reflector, notice how the major shadows under the neck, cheeks, and eyes have been filled in with soft white light. Think of a reflector as a moveable soft light source. You can change positions and angles to produce difference effects. Another option is to use the camera's flash to produce a similar effect. This is referred to as a fill flash. Fill flash essentially forces the camera to use its flash even though there is already enough light for a shot. To use a fill flash in your portrait shot, set your camera to its fill/force flash setting and take your picture as normal. You may need to move closer to your subject depending on the range of your flash. Some cameras have the option to adjust the intensity of the fill flash. Below is an example of a fill flash. Hold your mouse over the image to see the difference.
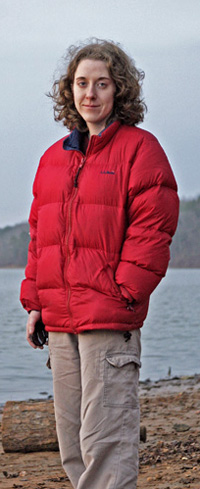
In addition to filling in shadow areas, a fill flash also adds a "catch light" in the subject's eyes. This helps direct the viewer's attention and gives the eyes a special emphasis. In the latest version of Adobe Photoshop, you can even fill in some of these shadows later on during post processing. In Photoshop CS, there is an option under the Adjustments menu called "Shadow/Highlight". In the comparison below, the original image was taken without the use of a reflector or fill flash. In the rollover image, we specified 40% under the Shadow section of the popup dialog box. Hold your mouse over the original image to see the effect of the Shadow/Highlight feature in Photoshop CS.
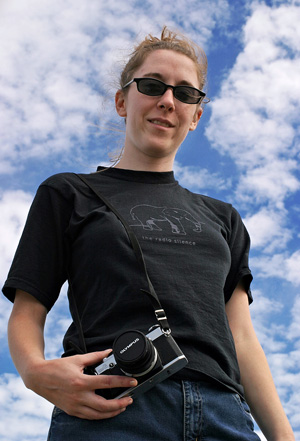
Look for interesting lighting when you are shooting outside. For example, when the sun is behind your subject, a "halo" effect can be achieved from the backlighting. In the example below, we took a picture of our subject with the sun behind her.

The effect is a warm highlight along the edges of the hair. In the picture above, we used a whiteboard to reflect light back to the subject's face to fill in some shadows. One of the problems that you will run into when shooting into the sun is that the camera will most likely underexpose the image. To avoid this, you should try setting your camera to spot metering. When set to spot metering, the camera will meter the light from a small point instead of the whole frame. Another option when working with backlighting is to apply an E.C. (exposure compensation). E.C. can be applied to force the camera to expose the image more or less than it normally would. When a camera is pointed at a bright scene, it will typically underexpose the subject. If this is the case, try applying a positive E.C. Check the results and adjust the E.C. until the picture looks well-exposed.

 |
 |

With these basic portrait ideas, you should have no problem producing great looking portraits with little effort. Remember to experiment with different shooting angles and subject positions. Pay attention to the quality of light. If it is too harsh or strong shadows appear, use a fill flash or reflector. For outdoor shooting, there is no excuse for not getting a reflector. They are inexpensive and will enhance your overall portrait quality. The more pictures you take, the more you will learn what works and what doesn't. In our next guide, we are going to explore the possibilities of night pictures. In the meantime, start taking more pictures of your friends and family. Pay attention to your technique and analyze the results. Before you know it, people will be begging you to take their picture!


30 Comments
View All Comments
j23smith - Wednesday, January 19, 2005 - link
Another tip for people to consider with digital cameras. When doing indoor photography and you want to avoid the harshness from the built-in camera flash, you can reduce the ISO setting and use the flash. It should reduce the harshness of the flash.i.e. instead of flash indoors at iso400, use flash indoors at iso100 or lower. play around and you will see what i mean.
stephencaston - Wednesday, January 19, 2005 - link
Thanks for all the kind comments. Remember as always, if anyone has any suggestions for content you'd like to see in future guides please let us know.Stephen
WooDaddy - Wednesday, January 19, 2005 - link
Great article. Great pictures.I would mention using a cable-release for slow shutter speed picture even if you have a tripod so as to prevent from camera shake when releasing the shutter. If a cable-release isn't available, then hold your breath and slowly depress the shutter release button to reduce the camera shake even further. It helps out with newbie photogs. I see you probably didn't need one though.
Calin - Wednesday, January 19, 2005 - link
Things I never even thought about...Thanks
Calin
CurtOien - Wednesday, January 19, 2005 - link
Thanks for the tips. :)Jeff7181 - Wednesday, January 19, 2005 - link
More good tips... now we wait for the photography nuts to come say how elementary the article is and tell us all that nobody can tell you how to take good photos, you have to have an eye for it, etc. etc. etc. blah blah blah :)Staples - Wednesday, January 19, 2005 - link
Some great tips. I know most of these but I forget to look at lighting when I shoot them. The pictures come out fine but later I kick myself for not paying attention to the lighting. My biggest problem is not paying attention. Reviewing the pictures on the tiny LCD does not tell me anything. My Canon camera a lot of times really picks terrible white balance in incandecent light but I can never tell till after I upload.sphinx - Wednesday, January 19, 2005 - link
Can't wait till your next article.sphinx - Wednesday, January 19, 2005 - link
Once again great article. I enjoyed your first article in this series. After reading the first article, I had taken my camera out of storage and started taking pictures again. Thank you for the renewed interest in photography. I'll be looking forward to your next article. No matter how hard I try I can't seem to take excellent night photos. Will you be combining all the articles into one PDF file.thehorriblejoke - Friday, October 15, 2010 - link
This is a really good Comment just beacuse i don't know. www.youtube.com/thehorriblejoke